Monday, June 30, 2008

Arte Y Pico Award

Many, many thanks to Chris of Mele Cotte for giving me the Arte Y Pico Award for creativity, design, interesting material and contribution to the blogging community. I'm honored!


It is my pleasure to pass this award onto the following worthy, worthy bloggers:

  1. Mary of Shazam in the Kitchen, who continues to amaze and inspire me with all of her delectable goodies, clever wit and clear writing style.

  2. Andy, The New Cook, offers great advice geared toward the kitchen-novice, but his well-researched posts are educational for the experienced cook, too.

  3. I would be remiss to exclude Danielle of Habeas Brulee, who has such style and pizzaz! Not only is she an attorney and a foodblogger, but she is an occasional restauranteur, as well. Brava!

  4. Michelle of Fine Furious Life offers us not only a peek into her life, but also brilliant recipes and outstanding photography.

  5. Warda, author of 64 Sq Ft Kitchen, is such a delightful foodblogger. Her photos and recipes are undeniably droolworthy, and her blog is a pleasure to read.

Thanks to all of you for continuing to produce lots of foodie inspiration for me and so many others!


Here are the rules for this award:

  • You have to pick 5 blogs that you consider deserve this award, creativity, design, interesting material, and also contrubutes to the blogger community.

  • Each award has to have the name of the author and also a link to his or her blog to be visited by everyone.

  • Each award winner must display the award along with the name and link to the blog that gave it.

  • Winners must link to the "Arte Y Pico" blog so everyone will know the origin of this award.

  • Winners must display these rules.

Thursday, June 26, 2008

Ice Cream Without an Ice Cream Maker


I've been thinking about making ice cream for quite some time now. Most store-bought sugar-free ice cream is tasty enough, but certainly limited in variety. And while I just made vanilla ice cream this time, now that I'm confident about the process I'll be getting creative with more flavors, you can bet!

Even better, this ice cream was made with regular old milk and eggs (so no need to buy special ingredients), and made with ordinary kitchen equipment--no ice cream maker needed!


Ice Cream
makes about 2 cups

2 cups milk
2 large eggs
1/3 cup sugar (I used Whey Low granular sugar substitute)
1 tablespoon good vanilla extract

Combine milk, eggs and sugar in the top of a double boiler. (I use a glass bowl that sits atop a small saucepan.) Whisk to combine. Put about 2-3 inches water in the bottom of double boiler and bring to a boil over medium-high heat. Once the water boils, reduce heat to maintain a low simmer and place your milk mixture on top. (If you're using a bowl over a saucepan like I did, make sure the water does not touch the bottom of your bowl.)

Whisk milk mixture constantly. This is very important--you don't want scrambled eggs! Once the milk mixture has reached the consistency of heavy cream (this takes about 30-40 minutes... if you stir briefly with a wooden spoon and draw your finger across the back, the trail will remain when it's ready; it was about 175 degrees fahrenheit on the candy thermometer), pour through a mesh strainer into a freezer-safe container. Immediately transfer your container to an ice water bath to quickly cool your custard and stir in your vanilla extract.

Move your custard to the freezer and check every half hour. When a frozen crust begins to form, thoroughly blend with an immersion blender or electric whisk. Replace cover and return to the freezer. Continue this process another 3 times to make sure ice crystals are as small as possible.

Note: If you don't have an immersion blender or electric whisk, make sure your freezer container is big enough to permit you to use your electric mixer. This procedure was learned by reading this article at David Lebovitz.

Variation ideas:

  1. Use other flavorings such as maple, raspberry or almond extract.
  2. Add stir-ins after your final blend, such as mini milk or white chocolate chips, chopped fresh or dried fruit, or nuts.
  3. As your custard cooks, infuse your milk mixture with cinnamon or even teas. I plan to try a chai tea-flavored ice cream in the future--doesn't that sound delish?

This is my entry to You Scream, I Scream, We All Scream for Frozen Desserts hosted by Mike's Table. Visit the roundup to see an array of fantastic recipes.

Tuesday, June 24, 2008

Dinner and A Chick Flick in Bed

Every other Sunday Mr.W and his cronies get together for some manly bonding. And sometimes the wives get together for some girl time--shopping, a movie, dinner, or any manner of feminine pursuits. But there are times when I'm on my own. Sunday was one of those days.

Days like this are perfect for hanging out in bed with the dogs and Thundercat, a good meal (not shared with the pets), the air conditioner running, and a great movie. Sunday's meal was a fantastic ham and swiss sandwich dressed with mayonnaise, mustard, oil and vinegar along with a perfect pear, a jug of Diet Coke and a couple of sugar free coconut candies.


And Love in the Time of Cholera. What a fantastic movie. Truly, it's one of those memorable movies you just have to see for yourself. Lovely--absolutely lovely. (Warning: there is quite a bit of nudity and... ahem... adult scenes.)

Now I want to read the book.

What do you like to do when you stay at home without any company?

Greens, Beans and Sausage Soup

Remember the greens I made?

I had a lot leftover, after only consuming what went on our hamburgers, so I decided to make soup out of them. This is another typical dish from my hometown that I enjoyed growing up.


Greens, Beans and Sausage Soup

makes 4 servings


olive oil

5-6 cloves of garlic, chopped
1 15-ounce can cannelini beans (or other white beans of choice)
1 cup water

1 cup chicken stock or broth

3-4 cups cooked leftover italian greens

1/2 pound medium italian sausage, without casings, shaped into small meatballs

In a soup pot, saute garlic in olive oil over a medium flame for about 30 seconds, or until fragrant. Add beans, water, stock and leftover greens and cover. Bring to a simmer and reduce heat to low.

Add sausage and simmer, covered, for 15-20 minutes or until sausage is cooked through, stirring occasionally.


Serve piping hot with bread for sopping up the delicious liquid.


This recipe is perfect for altering. Add other vegetables you may have on hand, cooked small pasta or even potatoes to this warming soup. Perfect for any time of year, and certainly very quick to prepare!

Sunday, June 22, 2008

Caribbean Pork Chops with Orange-Ginger Glaze, Black Beans and Saffron Brown Rice

I love caribbean food.

When we lived in the Florida Keys, Mr.W and I often enjoyed the local dishes. Jerk chicken, cuban roast pork and picadillo were some of my favorites; they were always accompanied by black beans and yellow rice, and usually plantains.

I've been hankering for some of that deliciousness lately, and so I made some last night and was very pleased with the result.

The pork chops were dusted with jerk seasoning and seared, then braised in a mixture of chicken broth and some lovely ginger-orange marmalade I discovered yesterday. This French import is no-sugar-added and sweetened only with fruit juice, so I wasted no time snatching this jelly from the market shelf, even at over $4 for the jar. A rare indulgence, and well worth it.

The beans simmered with ingredients right from my freezer--what a comfort food! I made the yellow rice from brown rice. You can see I garnished the rice with a chive flower. Mr.W was horrified and didn't know what it was. Sometimes it's good to keep the husband on his toes.

I wish I'd had a plantain to enjoy with this meal, but the glaze was sweet enough and a nice balance to the other flavors on the plate.


Caribbean Pork Chop with Orange-Ginger Glaze, Black Beans and Saffron Brown Rice
serves 2

Saffron Brown Rice
(this takes the longest time to prepare)

1 cup brown rice, rinsed
2 cups water
2 pinches saffron threads, crumbled
pinch kosher salt
sprinkle adobo seasoning (or granulated garlic)

Combine all ingredients in a saucepan with a tight-fitting lid. Bring to a boil, then reduce heat to a simmer. Let go for about 30-40 minutes, or until all water has been absorbed. Remove from heat and fluff with a fork.


Black Beans

1 15-ounce can black beans
1/2 can water
1/2 teaspoon granulated garlic (or 1 clove chopped fresh garlic) or adobo seasoning
pinch kosher salt
1/2 teaspoon chives (I used frozen)
2 teaspoons tomato paste (I used frozen)
1 tablespoon cilantro (again, frozen)
about 1/3 cup chunked frozen yucca (I buy this in a Goya bag) or peeled white potato

Combine all ingredients in a saucepan; simmer over low heat, stirring occasionally, until yucca or potato are tender (about 15-20 minutes).


Caribbean Pork Chops with Orange-Ginger Glaze

2 boneless pork chops
caribbean jerk powdered seasoning blend
1 cup chicken stock or broth
2 tablespoons no sugar added, fruit juice sweetened ginger-orange marmalade (or just use orange marmalade with a few slices of ginger added)

Sprinkle pork chops generously with caribbean jerk seasoning on both sides; allow to sit for 5 minutes while you heat up a saucepan over a medium flame.

Brown both sides of pork chops, turning only once. You want a nice crust on both sides. Add chicken stock and marmalade. Cover pan loosely with foil and allow to simmer for 10 minutes to finish cooking chops.

Remove pork chops from liquid and set aside. Reduce pan juices to a thick glaze. Serve chops drizzled with glaze.

Saturday, June 21, 2008

Hamburger with Italian Greens

My brother and I socialize quite a bit together with our respective spouses, along with other friends. We're friends as well as family. Isn't that awesome?


I think so.

This is the adult life I've always wanted. We see each other several times a week, and have many of the same friends. Day-to-day life entwined with family.

I like that we're friends. And what better friend to have than a sibling? Unconditional love and acceptance at it's finest. And the trust--well I've never had friends that I could trust as much as my brother and his wife, and Mr.W of course.

Every once in a while--maybe once a month or so--my brother and I like to have a quiet lunch just the two of us. Brother-sister bonding, without the spouses. Last week we did just that.

A popular local restaurant serves some really great sandwiches, and we each chose a similar meal. I selected a chicken-and-greens sandwich with a salad on the side, and he picked a burger with greens with french fries.

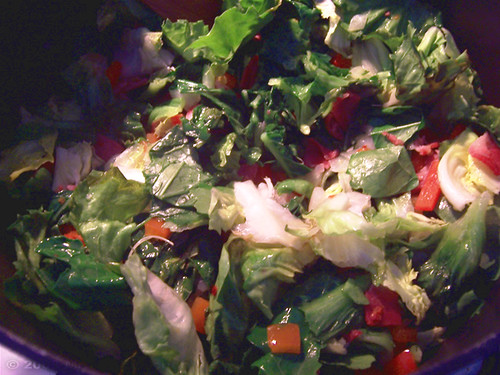
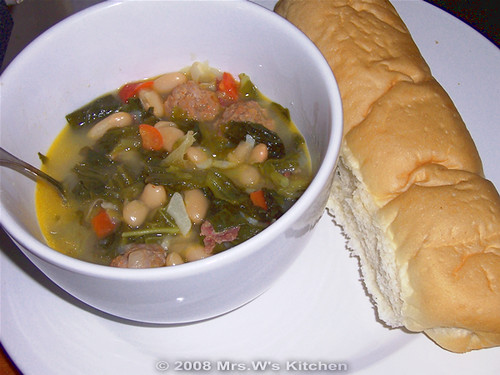
Around here, greens are a side dish made usually from escarole, though often mixed with other greens, that have been cooked down with onions and garlic and other yummy bits and served under a layer of browned parmesan breadcrumbs.

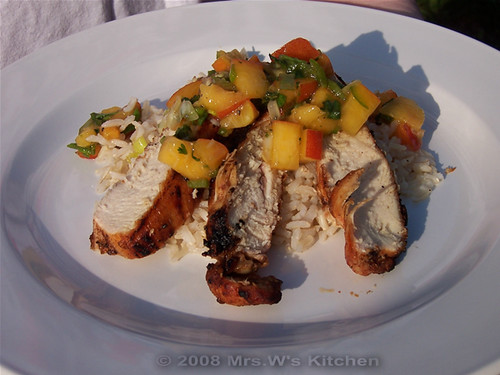
But I digress. I'd like to share a photo of my chicken-and-greens sandwich from last week:


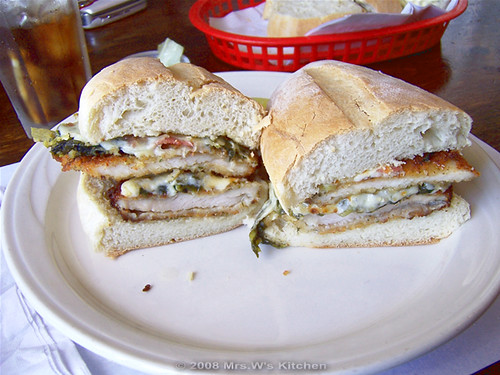
You can see the breaded chicken cutlets layered with cheesy greens. And what gorgeous bread! Looks good, doesn't it?

Well the idea was good. It was actually pretty dry with all those breadcrumbs, and in my opinion didn't have enough greens to moisten the sandwich. I liked to choke to death eating that thing, truth be told. I drank two whole glasses of Diet Coke just to get half the sandwich down.

But my brother said his burger was quite nice.

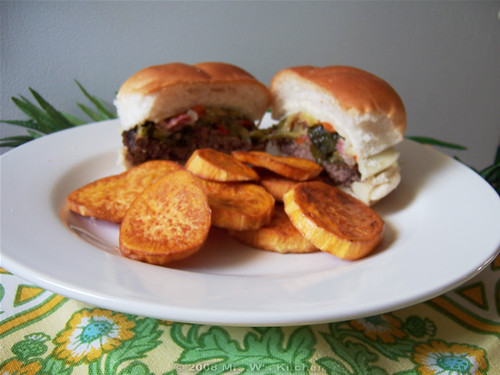
I decided to give the greens burger a whirl at home yesterday after my trip to the farmer's market. I already had half a head of escarole in the fridge, and along with a stalk of bok choy and the greens from a big bulb of kohlrabi, I made greens here at home, and topped a nice hamburger with a layer before adding a thick slice of provolone cheese.


Delicious!

I won't bother giving you a recipe for the hamburger--it's just pattied 85% lean ground beef mixed with a little salt and pepper before forming; the burger was fried off to well done and the bun was gently toasted for a pleasing crunch.

This makes a fantastic burger for those who prefer to go bunless, too! I served it with sweet potato fries (obviously cut round).


Italian Greens
makes 4 side dish servings

- olive oil
- 1 medium yellow or vidalia onion, chopped (I used frozen vidalia onion, because I ran out of onions--blasphemy, I know!)
- 1 small red bell pepper, chopped
- 3 or more cloves garlic, chopped (I forgot to add the garlic so I used granulated garlic toward the end of the cooking process; this is why mise in place is a good thing)
- 1 tablespoon (or to taste) prepared chopped cherry peppers (marinating in vinegar) OR dried red pepper flake plus a few dashes red wine vinegar
- 1/4 pound sliced, cut up cappicola or prosciutto (you could also use pancetta or bacon here; if you do, you should cook that FIRST, before the onions)
- a good 8 cups or more of freshly washed and torn greens (at least half should be escarole; thicker stalks and stems should be chopped and set aside)
- a handful grated Parmesan cheese
- salt and pepper to taste

In a large soup pot, saute onions, bell peppers and reserved chopped stalks in olive oil until onions are transparent. Add chopped garlic and saute until fragrant, about 30 seconds.

Add cherry peppers and cappicola and stir. Note: the amount of peppers I suggest make a spicy mess of greens.

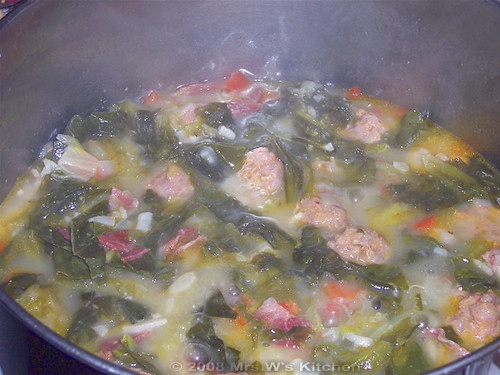
Now I like a little water clinging to my greens. Some people will say to dry them well before cooking--not me. We need a little liquid in this baby (making some super-yummy pot-likker). So start adding handfuls of greens to the pot. Go ahead and pile them up--as they wilt down they will make room in the pan.

Gently turn the contents of the pot with two spoons to allow the greens to get coated with the olive oil and delicious sauteed bits. Put a lid on your pot (or some foil) and let them steam down for about 10 minutes.

Remove cover and sprinkle with parmesan cheese, turning to coat. Taste and add salt and pepper as desired. (I find that with the ham and Parmesan cheese, I don't need to add extra salt. But that's me.) Remove from heat. Serve as desired. May be made a day ahead and stored, covered, in the refrigerator.


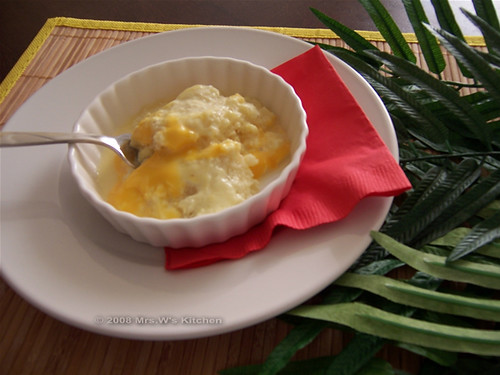
By the way, do you see that groovy yellow and green fabric under my plate? Its from a set of 6 cloth napkins I bought at the garage sale last week. I love them! What a fun print--expect to see those around here periodically!

Wednesday, June 18, 2008

Spaghetti with Broccoli and Cappicola


One of my favorite go-to meals is a quick pasta with broccoli and either cappicola or prosciutto. Cappicola is a hot italian ham, not too terribly spicy but certainly with kick that flavors the whole dish. Available from the deli counter, it's usually less expensive than prosciutto and easy to keep a quarter-pound in the freezer. I prefer to buy it thick-sliced.

You could make this without the pasta and double the vegetables for a wonderful side dish, omit the ham for a vegetarian option, or substitute the broccoli for another veggie that you prefer. Escarole and spinach are both delicious prepared this way.

Added bonus: this can be made using one pot!


Pasta with Broccoli and Cappicola
serves 4

1/2 pound thin spaghetti or pasta of choice
olive oil
1 medium yellow onion, sliced vertically
4 cloves garlic, chopped
1/2 pound (half bag) frozen broccoli florets
grated parmesan cheese
salt and pepper to taste
squirt of fresh lemon juice, about 1/4 teaspoon (optional)
1/4 pound thick-sliced cappicola ham, coarsely chopped

In a large pot, cook pasta according to package directions. Before draining pasta, reserve 1 cup of the cooking liquid. Drain pasta into a colander and return pot to stove over medium flame.

Pour some olive oil to pot and swirl to coat the bottom; add onions and saute until transparent, about 5 minutes. Add garlic and saute until fragrant, about 30 seconds. Add broccoli and reserved 1 cup pasta cooking liquid. Bring to a simmer, stirring often, until broccoli is warmed through.

Stir in drained spaghetti and turn to coat. Sprinkle generously with grated parmesan cheese. Taste to see how salty it is, then season to taste with salt and pepper. (Depending on whether or not you salted your pasta cooking water you may not want to add salt at all. I found that with the salted water, parmesan cheese, then adding the ham, it was just right without added salt.)

Finish with a squirt of fresh lemon juice (I think this adds a brightness to the pasta), add chopped cappicola ham; give it all one last toss and plate with an additional sprinkle of parmesan cheese.


Tuesday, June 17, 2008

Rhubarb Compote

I was fortunate to run across a woman selling rhubarb--$1 USD for as much as you want that will fit in a plastic grocery bag. Wow!

So I bought a good bit. I didn't fill up an entire bag, though, because I've never cooked with rhubarb before--my only exposure to the plant was stealing it from a neighbor's garden as a child and eating the stalks on the run. It was more of a dare back then, though, because I never cared much for the sour taste.

Yesterday I peeled and cut up all of that rhubarb--totalling four cups when it was all prepared! I topped all of that with 3/4 cup of sugar substitute and let it macerate for a while as I reviewed a number of recipes online to wrap my mind around what I wanted to do with all of that rhubarb (according to what was in my pantry).


I decided on this easy compote that I enjoyed this morning topped with vanilla yogurt. The tartness of the rhubarb was apparent, though complemented by orange and vanilla. But it is still rhubarb, after all, and while I will certainly be noshing on this treat for several days, it will be in smallish amounts. Next time I will definitely add some cinnamon to this treat.


Rhubarb Compote

4 cups rhubarb, larger stalks peeled, cut into 1/4-inch pieces
3/4 cup sugar (I used sugar substitute)
1 tablespoon vanilla extract
1 teaspoon chopped dried orange peel (you can use fresh zest)
1 4-serving size package orange gelatin dessert (I used sugar free)
1 cup of water

Combine rhubarb and sugar and set aside for 15 minutes to macerate. Combine rhubarb mixture in a large saucepan or dutch oven with remaining ingredients and set over a medium-low flame. Bring to the simmering point and simmer 10 minutes or until rhubarb is softened. Immediately remove from heat and allow to cool. Refrigerate overnight.

Serve with ice cream, whipped cream, yogurt or as desired.


This compote will look set like jello after refrigeration, but it's much softer than that. The gelatin simply adds body, sweetness and orange flavor.

What do you do with rhubarb?

Monday, June 16, 2008

Simple Salad

It was a super-busy weekend, with the local farmer's market open Friday, a garage sale all day Saturday and some yard work for several hours yesterday in the hot, hot sun. And church. And a haircut. A sassy new summer hairdo. Hooray for short hair!


Since I was exhausted last night, dinner was a salad. I bought a head of Jericho lettuce at the farmer's market Friday--a Romaine variety, a light-green plant with a large, dense head that is bolt resistant and stays sweet in hot weather. It was a delightful base to my salad.

I topped the salad with plum tomatoes (salmonella be damned!), chunked cucumber and red bell pepper, sprinkled with salt and pepper, drizzled with a light vinaigrette, and all topped with a perfectly poached egg.


Yum! The egg yolk combined with the vinaigrette for a delicious sauce perfect for sopping with a piece of bread.

Well I didn't eat bread. I just licked the plate.

Thursday, June 12, 2008

Picnics in the Sun

A friend and I went to the beach today for some relaxation. For some reason there was no swimming today, but we went ahead with our picnic and just hung out on the beach. And I got sunburned.

So dinner today was a few strips of bacon and scrambled eggs. Simple fare, quickly cooked.

But what's more interesting is that it's almost time for our Second Annual Redneck Bar-B-Que, and I need some ideas. I want simple, simple, simple--and, of course, appropriate to the theme.

I'm considering making it a weenie roast, with potluck sides. I also found moon pies on sale and bought several boxes. Perhaps a moon pie pudding? (If Paula Deen can do bread pudding with Krispy Kreme donuts, why can't I use moon pies?) I know I can get someone to bring a giant watermelon for a seed-spitting contest.

Of course there's also a best-dressed contest--appropriate attire is strongly encouraged!

If you were throwing a redneck bar-b-que, what would you serve? What other ideas can you come up with?

Wednesday, June 11, 2008

Pumpkin Coconut Panna Cotta

Back in October I read Chez Pim's post about a pumpkin coconut panna cotta. I was so pleased by the ingredient list (all pantry items--hooray!) that I saved the recipe and placed it in my "to try" file.

I tried it today.


First, I'd like to go on record by saying that pumpkin should be left for autumn. I really didn't care for the pumpkin-y taste at this time of year. Not that there was anything wrong with it in any way--it just was a bit too heavy in flavor for June. I also felt that the coconut flavor disappeared. Perhaps next time I'll add some coconut rum for a bit more punch. Toasted flaked coconut or crushed ginger snaps would make a great topping.

The dessert was delightful, however. Not too firm--just what a panna cotta should be--and certainly a lovely alternative to the ubiquitous pumpkin pie typical at American holiday tables.

So keeping that in mind, do save this recipe in your "to try" file for this upcoming fall season.


Pumpkin Coconut Panna Cotta

Original recipe here. I've changed this slightly so you may want to view Pim's original instructions.

1 packet gelatin
1 cup water, divided
1 cup solid pack pumpkin
1-1/2 cups lite coconut milk
1/2 cup brown sugar (I used substitute)
1/2 cup white sugar (I used substitute)
1 teaspoon salt
1 cinnamon stick
1/4 teaspoon freshly ground nutmeg
dash ground cardamom

Mix gelatin with half the water and allow to sit for 5 minutes.

Meanwhile, combine in a saucepan the remaining water, pumpkin, coconut milk, brown and white sugars and salt. Bring to a boil and reduce heat to low. Add cinnamon stick, nutmeg and cardamom along with gelatin mixture and simmer for 5 minutes. Remove from heat.

Ladle into containers or mold(s) and refrigerate several hours to set. Unmold onto a plate, or enjoy right from containers.

Tuesday, June 10, 2008

TGIR... and a Sausage Supper

Thank God It's Raining!


It has been disgustingly hot over the last few days here in Central New York. And I mean hot. 90 degrees (Fahrenheit) in the house hot.

And that means too hot to eat, much less cook.

But it's been raining today. And thank goodness, because it's cooling things off nicely--inside and out. It's amazing how creative one can be when you want that cool breeze to come inside, sans water, of course.

Thundercat is frantically bouncing from window to window to make sure she's not missing a thing. The life of calico cat ownership, I suppose.

Today's supper began with a desire to heat the kitchen as little as possible, and to achieve a grilled outdoors flavor without actually grilling outdoors.

It's not as difficult as it sounds.

I use a grill topper pan right on the stove. You know the ones. Sometimes they're made of wire mesh, other times they're black metal with lots of holes. They allow you to grill veggies without them falling into your bbq fire.

These pans work great on top of the stove, both for grilling bread and vegetables. (Anything else will drip too much and make a mess on your stove.) I don't have a hard-and-fast recipe, but I'll share my method with you.

I grilled a sliced yellow onion, a quartered green pepper, several quartered mushrooms, and a sliced eggplant (all the vegetables were lightly brushed with olive oil before cooking). This was all done in stages, and as each veg was lightly charred and tender, they were transferred to a saucepan.

I also pan fried about a half-pound ring of sweet italian sausage, cut into chunks (casing left on), which was also transferred to the saucepan after browning, followed by one 8-ounce can of tomato sauce. (And here is where you can get creative--add garlic, herbs, hot pepper flake, or anything you wish. Watch the salt, though--that sausage tends to be salty!) The lid went on and the whole deal simmered for about 30 minutes over low heat.

Wow! The veggies softened further--the eggplant fell right apart, which is really best here so that Mr.W won't know what he's eating--and melted right into that tomato sauce. We ate the whole deal with italian bread for sopping. (It could also be served over your favorite pasta, along with some yummy melted mozzarella or provolone cheese.)

It is a perfect hot-weather meal--easy fix on the stove that didn't really heat up the kitchen at all, made early in the day and reheated in the microwave at dinnertime, served with a nice chunk of italian bread. Yum!

Monday, June 9, 2008

The Veal Conundrum

I tried veal today for the first time. I didn't like it.

There was something... something about its essence. Something in the background. Not a gaminess, no. But similar to that.

It was a three-quarter pound veal chop that I sauteed in yummy bacon grease along with some onions, mushrooms and potatoes and finished by braising everything in about a cup of red wine for a lovely sauce.

I selected this cooking method based on a number of recipies I found on epicurious.com, all to rave reviews. And there wasn't anything about the ingredients that I don't like--except for the veal, which was the unknown factor.

It flavored everything. And it all went into the trash.

But it sure looked good.


See?

I guess I'm just not a veal person. What do you think? Should I have done something differently?

Friday, June 6, 2008

Berry Good

You all know by now that I'm a huge fan of berries--they're low on the glycemic index and just right for my dietary lifestyle. So I keep them around! A bag of frozen mixed berries is in my freezer always.

On a recent trip to the liquour store (I'm not really much of a drinker, but I do go there every once in a while for a little inspriation) I noticed a small bottle of Prosecco. Now I've seen FoodTV gals use Prosecco a number of times in bellinis, but I've never tried them myself. So I bought it, and it's been in my fridge just waiting for me to try it.

I figured today was as good a day as any to indulge in a wee bit of "Oh Be Joyful," as my grandmother would call it. (Yes, she refers to any alcoholic beverage as "Oh Be Joyful." I don't know why.)

First, I took about a cup of mixed frozen berries out of the freezer to thaw. When no longer frozen, I pureed them with my hand blender and poured it through a wire mesh strainer to remove the seeds. That took some doing, but it was totally worth it! Then I sweetened the remaining puree quite a bit--about 2-3 tablespoons of sugar substitute. Just go by taste--you want to make it quite sweet, because (at least in my case) the prosecco is bubbly but not very sweet. If you're a lover of sweet drinks, like me, then you'll want the puree to balance that dry wine taste. Then fill your glass about 1/3 full with the berry puree and top off with prosecco. Yum!


Perfect for porch-sitting on a Friday afternoon.

Fusion Yumminess

There's something wonderful about eating leftovers. Lunch today consisted of leftover spicy peanut sauce (yes, I keep making more) over cooked whole wheat spaghetti, along with a few spoonfuls of leftover nectarine salsa.

Holy macaroni that's good!


Well crap. Did I just use a phrase coined by my arch-enemy Rachel Ray? Boo!

Thursday, June 5, 2008

Supper on the Grill

Last night I popped into the grocery store and found two lovely nectarines. I couldn't resist! So I made a fun little salsa with them, and served them as a topping for grilled jerked chicken breasts over steamed brown rice.

Wow!


What a lovely alfresco meal! Here's how I did it:
I marinated three fat chicken breasts (about 1.25 pounds) with a good 1/4 cup of prepared jerk seasoning blend and a little olive oil for about 6 hours in the refrigerator today. When the charcoal was ready, I grilled off the chicken.


Here you can see that I over-charred the exterior... but the inside stayed tender and juicy.

The nectarine salsa was made in the morning and marinated in the refrigerator for several hours. Here's the recipe:


Nectarine Salsa
adapted from this recipe
makes about 2 cups

2 ripe nectarines, stoned and diced
2 green onions, white and green parts, chopped
1/4 cup cilantro, finely chopped
1 serrano chile, chopped (with or without seeds, as you wish; I left them out for a very mild heat)
1 teaspoon sugar (I used sugar substitute)
1/2 teaspoon sugar
1/4 teaspoon ground grains of paradise
zest of 1 lime
juice of 1 lime

Combine all ingredients and refrigerate for several hours to allow flavors to marry.


Even though I enjoyed it, I felt that this salsa still lacked something. I think in the future I'll add orange juice instead of lime for more of a sweet balance, and probably a second chile.

After supper, we enjoyed grilled peaches and cream. (I ate mine in sugar-free hazelnut flavored non-dairy creamer. Yummy!)


It was a really nice finish to a lovely meal.

Wednesday, June 4, 2008

Recycle Rant

Please do bear with me as I divert from my regular foodie format to indulge a bit of a rant on recycling in the United States.

Fifteen years ago I was living in South Korea. I traveled there as a non-command-sponsored military spouse. That means that my husband was in the U.S. military and I was not allowed to accompany him on that assignment. However, because I am that kind of gal, I applied for a visa on my personal passport, bought a plane ticket and went anyway. I had a small apartment near the air base and was able to get a job at the American School on the base. I had access to some things on most days, but I preferred to buy most everything on the local economy.

Most American-made products could be purchased off-base not only at better prices, but using advanced packaging techniques that I appreciated. Most products--like laundry soap, shampoo and conditioner, fabric softeners--even toothbrushes--were produced with recycling in mind.

Because Korea is such a small country, they must recycle.

Liquid products were sold in their regular containers of product in moderation. Then there were the refill packs in thin, bio-degradeable paper or plastic containers. You were meant to re-use that plastic shampoo bottle! Even toothbrushes had screw-on bristle heads. The handle could be used over and over again.

That's what I call responsible marketing. Not these glossy ads in the center of Better Homes and Gardens about the different products you can buy (all in their own, sturdy plastic containers, of course) that make you more of a "green shopper."

If I could buy refill packages in Korea fifteen years ago, why can't I do it here, now? Why?

Because companies can't justify current price structures if they offer cheaper packaging options. Yet these U.S.-based companies know how to provide these products in smaller countries that require it. Hmm.

What do you think? Should we demand the same? I would gladly refill my plastic containers with less-expensive refill packages. Good for my pocketbook, and good for the environment.

Tuesday, June 3, 2008

Grilled Lamb Chops and Vidalia Onion

Lamb chops are a special favorite of mine. Perfect tenderness and ideal for grilling, these little babies are pricey--and worth every penny. Of course I bought mine on sale, and at only three in the package it was under $2.

Today I doused the little darlings--along with a sliced whole vidalia onion--with a simple marinade for a few hours and grilled them while the marinade reduced on the stove. Served with a simple greek salad with a lemon vinaigrette, it made a perfect lunch.


Mind you I had a slight grill flare-up, hence the charred appearance of the chops. I assure you, however, that they were a perfect medium on the inside!

Even though I only had three chops, I used the full marinade recipe with plenty of sauce leftover. The original recipe called for 8 chops to feed 4. I've printed my version below scaled to serve 2.


Grilled Lamb Chops and Vidalia Onion
adapted from this recipe
serves 2

Marinade

Combine in a large plastic zipper bag or container of your choice:

3/4 cup red wine
1/4 cup olive oil
1 tablespoon dried oregano
1 teaspoon granulated garlic
2 teaspoons red wine vinegar
1/2 teaspoon salt
1/2 teaspoon ground black pepper
4 lamb chops
1 large vidalia onion, sliced thickly

Marinate in refrigerator for 2 hours or longer.

Prepare grill to medium-high heat and oil grill grate(s). Grill onion slices on both sides to lightly char and soften. Cook lamb chops about 4-5 minutes per side or until desired doneness is reached.

(Hint: Keep a spray bottle of water nearby to douse flare-ups.)


Simmer reserved marinade on the stove to reduce by half.


Greek Salad
serves 2

combine in a bowl:

2 cups chopped lettuce of choice
1 small tomato, sliced
2 tablespoons crumbled feta

My favorite lemon vinaigrette dressing:

2 tsp chopped fresh oregano
1/2 tsp ground black pepper
1/2 tsp kosher salt
juice of 1/2 lemon

2 Tbsp extra-virgin olive oil

Dress salad and top with lamb chops and grilled onion slices. Drizzle reduced marinade over all and enjoy with grilled flatbread for a decadent meal.

Monday, June 2, 2008

Baked Garlic-Cheese Grits

We're having a cool spring here in Central New York. Most days are cold in the mornings, with high-50*F weather in the afternoons. It's an oddity to get into the 60s or higher. I've been joking that summer is OVER and we're actually enjoying autumn.

But I suppose it makes it nice, in a way, because I can comfortably use the oven, especially in the mornings. And oh, boy, do I have a treat for you this morning!


Mmm... doesn't that look wonderful? And so super-easy! Just mix it all in one bowl and in the oven it goes. And that's just the right thing for any breakfast or brunch! I'll be making this again and again. It's such a quick and comforting breakfast, and would make a lovely addition to any meal. I can imagine it as part of a late supper with a few pan-grilled shrimp and a glass of white wine!

The credit must go to Paula Deen for the original recipe--I only adapted it to a smaller scale and to use instant grits. I also omitted the extra butter, because I felt the cheese provided enough fat for this dish without compromising the flavor.

(It's impossible to find regular grits in my area; I know I could have used polenta, but that tends to be a coarser grind and not really what I'm looking for.)


Baked Garlic-Cheese Grits
serves 3

1-1/2 cups chicken broth
6 tablespoons instant grits (that's 1/4 cup plus 1/8 cup)
pinch ground black pepper
2 pinches garlic powder
1 tablespoon grated parmesan cheese
1/8 cup milk
1 egg
2 or more slices cheese of choice (I used yellow american; cheddar or any cheese you like would be fine)

Combine everything but your two slices of cheese in a bowl and whisk to combine. Pour into a greased small (2 servings size, or use individual ramekins) baking pan and bake in a preheated 350*F oven for 15-20 minutes, or until set (top will still giggle slightly). Individual ramekins will cook a bit faster.

Remove from oven and top with cheese as desired; rest 5 minutes, or until cheese is melty and perfect. Spoon out or cut into wedges and enjoy.


I will say that the texture of these grits baked in a bit firmer than if you prepare grits on the stove or microwave--but I enjoyed them nonetheless. The ease of throwing this together makes this recipe a winner.

LinkWithin Related Stories Widget for Blogs