
My brother had a childhood friend in town and we had talked about all getting together for a visit--I thought it would be nice to bring a batch of homemade ice cream to share, but I wanted something a little out of the ordinary. Thinking about the old days brought me back to a favorite memory.
I must have been two or three, and it was the day my mother taught me about dunking as a breakfast ritual. Specifically, the folding and dunking of cinnamon toast--for her, into hot coffee. For me, into my cocoa.
Whenever I've mentioned this to--or, God forbid, actually done it in front of--friends or husbands, the reaction has always been the same. Horror. Why wet the toast? Bread and cocoa? Oh, the humanity!
But they're barbarians. Toast. Gets. Dunked. And long after the toast is gone, there's this lovely spicy buttery taste added to the hot chocolate that's delicious.
Which inspired this ice cream recipe. Well, that, and the small fact of a leftover half-pan of brownies that needed to be used.
I actually hoped to spice this mixture only with ginger for a little heat, but the 2-inch piece of ginger either wasn't enough or didn't steep as long as it should have. I added additional spices for a pleasant melange which really was more in keeping with the memory that inspired it.
Unfortunately, our plans with my brother's friend changed and the ice cream wasn't eaten. Well, not by guests, anyway.
Spiced Chocolate Ice Cream with Brownie Chunks
makes about 1 quart
If you don't want the brownie chunks, double the creme anglaise recipe to make sure you have a whole quart of ice cream.
1 cup water
2-inch piece of ginger, unpeeled and roughly chopped up (will eventually be strained out)
1/3 cup nonfat dry milk powder
1/4 cup unsweetened cocoa powder
pinch each ground cardamom and ground cinnamon
few scrapes nutmeg
4 egg yolks
1/3 cup agave nectar (I used amber)
1 cup heavy cream
1 tablespoon salted butter
1 teaspoon dark rum
1/2 pan leftover brownies. (Mine were from half of a batch cooked in a 9x13-inch pan. If you want something that's more diabetic-friendly, try this flourless chocolate cake recipe. Very brownie-like.)
In a small saucepan, combine water and ginger. Cover and bring to a boil; remove from heat and steep 5 minutes.
Whisk in dry milk powder, cocoa and spices. Cool and refrigerate for 1 hour.
In a medium stainless steel or glass bowl, whisk egg yolks with agave nectar to froth. Stir in cocoa mixture and heavy cream. Set bowl over a saucepan of simmering water, making sure that the water doesn't directly touch the bottom of the bowl. Add butter and stir constantly until thickened. To test for doneness, stir gently with a spoon and pull it out; draw your finger across the back of the spoon. If the trail remains without filling in, it's ready.
Remove from heat; pour through a fine mesh into a clean bowl. Stir in dark rum. Cover and refrigerate until cold.
Process in your ice cream maker according to manufacturer's directions. During the last couple of minutes, add your cut-up brownie chunks. Don't allow that to process for long--you just want them folded in.
The consistency will be a little thin, so you definitely have to freeze this one to harden further.
Transfer ice cream to a freezer-safe container and freeze to harden. Even after freezing for several days, my batch is nicely spoonable but still keeps it's shape.
Monday, June 15, 2009
Spiced Chocolate Ice Cream with Brownie Chunks


Monday, June 1, 2009
Tres Leches Cake with Strawberries
The family got together yesterday to celebrate my grandmother's 89th birthday. My sweet aunt hosted us for a delicious Italian Sunday dinner--stuffed shells were the star, but soon after the pasta was demolished we tore into this cake.
This is another from-a-box cake, doctored for perfection. Everyone loved it, though I must say it was VERY sweet and there are some things I would do differently for future tries.
First, the recipe is from the What Can I Bring? Cookbook by Anne Byrn, the Cake Mix Doctor herself. I guess this was the right book for me, since I'm a box cake mix fan. I recently borrowed this book from the library
I won't reprint the recipe verbatim here. You can find the cookbook at your local library--or online here--to see for yourself. It's very easy to make, but I do have a few notes:
- First, this mustn't be removed from the fridge or frosted until the very last minute. You can see from the photo above that the milk syrup was oozing out of the bottom and pooling at the base of the plate. It got much worse and dribbled onto the counter, the tablecloth, my aunt's blouse... ugh! Of course we made short work of it with a couple of spoons, but still. Messy, messy, messy. That said, it would be even easier made in a regular 13x9-inch pan to contain any leche-leakage.
- I modified the soaking syrup a tad by reducing the amount of heavy cream from 1 cup to 1/2 cup because I was convinced that this cake couldn't possibly soak up all that milk. It did, but it was fine without the extra half cup of cream. In the future I might try using light coconut milk to replace the cream and some of the sweetened condensed milk. I think it would add a nice additional dimension to the cake, and since we found it all rather on the sweet side, reducing the sweetened condensed milk would be a good thing.
- I forgot the vanilla extract. It wasn't missed at all.
- I baked the cake in a 7-inch deep springform pan. All the batter fit in the same pan, which was great. It took a good hour in the oven, though, to cook through.
- The sliced strawberries were a fantastic accompaniment. They cut through some of the sweetness of the cake nicely.
- I frosted the cake with non-dairy whipped topping, since I had to travel an hour with this whole shabang and assemble at my aunt's house. Much easier than dealing with whipping cream at someone else's house.
Come to think of it, the milk probably was leaking out because we'd traveled an hour with the thing! I wonder if it would be better to freeze it before transporting?
At any rate, it was a success. G'ma enjoyed her cake, and so did the rest of the family. I'd call it a success.
Monday, May 18, 2009
Banana-Coconut Ice Cream
Do you ever have just one banana hanging around?
Whenever I get bananas, Mr.W gobbles them up faster than I can keep up. I might get only one before they're gone... or on the way south. I know that when the brown spots arrive they're still fine to eat. I just don't like them quite that sweet.
And then there's that lonely speckled banana on the counter. Not enough to make banana bread, or anything else for that matter.
I hate to waste food. I really, really hate it. When I have to toss something because I forgot about it, or I wasn't organized enough, I beat myself up over it. Wasting food is at the top of my no-no list.
By that logic, any lonely banana must be used--so I throw it in the freezer.
Freezing bananas makes sense. Bananas a little past their prime, but perfect for recipes hold up beautifully in the freezer. They'll turn black, but that's okay. The consistency changes a wee bit, but that's okay, too. When I have two or three in the deep freeze I'll take them out to thaw overnight before using them. And pre-frozen bananas don't need to be peeled--you just snip off the end with scissors and squeeze them out of the peel. They're a snap to mash, too--just stir with a fork!
Avoiding food waste and making recipes easier. I love it.
I also love pairing banana with coconut. Two of my favorite flavors come together in perfect harmony. The sum is better than the two parts, if you will.
This time, it was in--what else?--ice cream.
I'll admit that I've been a little afraid of custard-based ice creams. Somehow the time investment of cooking, cooling... it all seemed too labor-intensive. After all, I'm an instant-gratification gal. But some previous ice cream experiments not posted here offered less than desirable results, so I knew it was time.
There's was nothing to be afraid of, after all. It was so easy to make in the stand mixer! (A blender or food processor would be an appropriate machine to use, as well.) And what a difference--the consistency during processing was almost immediately ice cream. And the taste? Well, let's just say I've been sneaking some at night.
Banana-Coconut Ice Cream
makes about 1 quart
1-3/4 cups coconut milk (about 1 can, use divided; I used reduced fat)
2/3 cup sugar or substitute
2 eggs + 1 yolk
1-1/2 tablespoons all-purpose flour
1/8 teaspoon salt
1 tablespoon banana liqueur (I used 99 Bananas; optional)
1/2 cup light cream or your favorite liquid coffee creamer (I used sugar-free hazelnut flavor)
2 bananas, mashed
1 cup dessicated coconut (I used unsweetened, reduced fat)
Place 1-1/4 cups coconut milk in a medium saucepan and heat just to a boil.
While coconut milk is warming, beat sugar and eggs + yolk together in a stand mixer until pale yellow. Beat in flour and salt. With mixer running (I used the whisk attachment for best air incorporation), slowly pour in hot coconut milk in a very thin stream. Add banana liqueur, remaining 1/2 cup coconut milk and light cream (or coffee creamer, if using) and beat for a few seconds to combine.
Pour entire mixture back into saucepan and set over a low flame. Cook, stirring, until thickened. It's ready when thickened custard coats the back of a spoon and a finger-trail does not immediately disappear.
Completely cool custard mixture in the refrigerator before continuing.
Blend cooled custard with mashed bananas. Process in an ice cream maker according to manufacturer's instructions. Add dessicated coconut as an add-in. (For my ice cream maker, you process the ice cream for 25 minutes, then add-ins during the last 5.)
Enjoy immediately or freeze for future use.
Wednesday, April 8, 2009
Bittersweet Chocolate Mousse Tart

Sometimes you just need something ooey-gooey chocolate. For me, this is it: a decadent, creamy slice of pure chocolate mousse atop a cookie crust. The slice pictured was almost too rich--a sliver is all you need.
Bittersweet Chocolate Mousse Tart
Serves 8-12
Crushed cookies for a bottom crust (I used 20 small sugar-free shortbread-type cookies)
4 tablespoons unsalted butter, melted
6 ounces unsweetened chocolate
1/2 cup sugar or sugar substitute
2/3 cup hazelnut-flavored sugar-free coffee creamer
2/3 cup heavy cream
4 large egg yolks, whisked well
1/8 teaspoon instant espresso powder
1 tablespoon vanilla extract
Preheat oven to 300*F. Lightly grease an 8-inch tart pan (mine has a removable bottom, which I recommend for ease of removal) and wrap the exterior with aluminum foil.
Combine crushed cookies with melted butter in the bottom of prepared tart pan. Set aside.
Combine chocolate, sugar, creamer and cream in a heavy-bottomed saucepan. Set over low heat and cook until chocolate is completely melted and mixture is smooth, stirring frequently to prevent the chocolate from scorching on the bottom and sides of pan. Remove from heat and cool slightly for 5 minutes.
While whisking, pour a dollop (about 2-4 tablespoons or so) of hot chocolate mixture into whisked egg yolks. Continue to add hot chocolate mixture slowly while whisking in. When fully incorporated, add espresso powder and vanilla extract. Mixture will be thick.
Gently pour chocolate into prepared tart pan. Tap gently on the counter to help remove bubbles.
Place a folded tea towel in the bottom of a large baking pan and place foil-wrapped tart pan on top. This will prevent the tart from sliding around and ensure slow, even heating--see photo at right. Pour boiling water into outer pan to about 1-inch depth. Carefully place in preheated oven and bake for 45 minutes or until top is set (does not leave a mark when you gently touch surface with finger). Remove from oven and cool 5 minutes.
Carefully remove tart pan from water bath. Cool on the counter to room temperature, then transfer to the refrigerator to chill for at least 2 or 3 hours.
Gently remove tart from pan. Serve garnished with berries, coulis, whipped cream or other desired toppings. 
This is my entry to Tasty Treats' foodblogging event, For the Love of Chocolate. The roundup--part 1 and part 2--offer dozens of fabulous-looking chocolate desserts. Take a look and enjoy!
Friday, March 6, 2009
It Ain't Tiramisu, But It's Good
One particular discussion that I've had recently with several people is: why bother with sugar-free desserts? Even with diabetes or other dietary restrictions, many people would rather do without completely than to waste precious calories on alternate sweets. And I grant that there is merit to the argument--but for people like me, people with a sweet tooth that just won't be shoved into a closet, the choice isn't that simple. And I've tried--believe me, I've tried. Denying myself only results in one outcome: the binge.
You know what I mean. The snacks snuck in your purse. The candy bar tossed in with your groceries during checkout. It happens without even thinking--and before you know it, you've eaten a whole box of oreos. Oh, yeah. I've done it all.
The beast must be appeased. And carefully-crafted, planned sugar-free sweets is the way I deal with it. It's okay if that means a little less of something else during the day. I can accept that.
Which brings me to tiramisu, dessert of all desserts. I adore this stuff. Dream of it. Crave it. Chock full of yummy fat and calories, however, it's something I just can't have in my life with any kind of regularity. But I can make a dessert that has many of the same flavors, reduced fat and even sugar-free, with an indulgent feel and within my food lifestyle.
Made in the style of the classic dessert, my version uses low-fat, sugar-free mocha ricotta cream layered with espresso-dipped sugar-free cookies. And yes, I skip the mascarpone entirely. Blasphemy, I know--it ain't tiramisu, but it's good! I promise!
Not Tiramisu
serves 2
1 cup low- or non-fat ricotta cheese
1 teaspoon unsweetened cocoa powder
2 tablespoons sugar or sugar substitute
1/2 teaspoon vanilla extract
1/8 teaspoon instant espresso powder
crisp, sugar-free cookies (I used almond cookies; if you want a full-sugar version, use ladyfingers or another crisp cookie of your choice)
demitasse cup of strong coffee or espresso (I made espresso with 1 rounded teaspoon instant espresso powder, 1 tsp sugar or a packet of sweetener; I also threw in a dribble of vanilla extract.)
optional: chocolate syrup (I used sugar-free) or chocolate shavings for garnish
Combine ricotta, cocoa, sugar sub, vanilla and 1/8t instant espresso powder in a bowl; blend well using an electric or stand mixer until well combined.
Select two small dessert dishes (demitasse cups would be perfect) for your dessert. One at a time, dip cookies in prepared espresso and line the bottom of your dessert dish. Top with a layer of mocha ricotta mixture. Repeat with another layer of espresso-dipped cookies. Repeat, ending with the ricotta cream. Cover and refrigerate for at least one hour. Serve garnished with chocolate syrup or chocolate shavings.
Wednesday, December 17, 2008
Lemon Posset
Somewhere between sexy Custard and sophisticated Panna Cotta, behind high-and-mighty Creme Brulee and tiny compared to Pudding, is Posset. She's a shy girl, often overlooked and too frequently thought of as a plain jane.
She's anything but.
Once you coax her out into the open, she's remarkable. She can dance, she can sing, she can cook and sew. She's the total package.
I'd never heard of Posset until a few days ago, when Sam did a post about it. It was love at first sight. I immediately whipped up two batches. One sugar-full for my lemon-loving Mr.W, the other using sugar substitute for me.
Nothing could be easier: simmer cream and sugar for three minutes, whisk in citrus juice, pour into serving containers and chill. It sets up firm like panna cotta, eats like a dream and makes you look like a rock star.
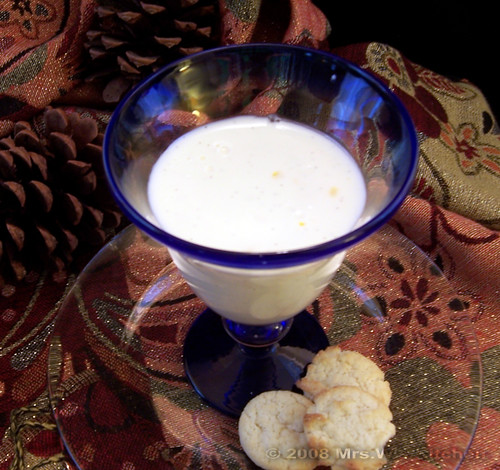
I served it in wine glasses with cookies on the side. Mr.W just went for the posset, ignoring the lonely gingersnaps meant to accompany. He gobbled it so fast I didn't need further proof of it's success--that is, until he started licking into the glass to get the last possible drop. I enjoyed mine with crushed sugar-free coconut cookies on top, which I thought were in perfect textural contrast.
Imagine the variations! Served in tiny pastry shells topped with whipped cream for little lemon pies. In ramekins dusted with Pop Rocks, drizzled with berry coulis or doused with your favorite booze. In glasses, simply served with cookies for dunking (or crushing over the surface, like I did). Or balsamic raspberries. Or in a martini glass with a pretzel rod stirrer. How about layered with lady fingers? Or nuts? Or fresh summertime blueberries? Made with other citrus juices, like lime, tangerine or blood orange. Infused with spices, like cinnamon, ginger or star anise.
The options are endless, from simple to elegant, suitable all year 'round.
This is a must try, my friends. Make some, and make it soon. You'll be so glad you did.
Lemon Posset
inspired by this recipe
1 cup heavy whipping cream
1/3 cup granulated sugar or sugar substitute (I used Whey Low powdered sugar substitute)
1/4 vanilla bean, scraped of seeds (discard bean husk, bury it in your sugar bowl, or add it to your homemade vanilla extract) (optional)
about 1 tablespoon grated lemon zest (optional)
2-3 tablespoons lemon juice (depending on how tart you like your desserts; I used a scant 3T)
Combine cream, sugar and vanilla bean seeds in a small, heavy saucepan and slowly heat, whisking occasionally, until you reach a simmer. Simmer three minutes, then remove from heat. Whisk in zest and juice. Cool 5 minutes, then transfer to serving glasses or ramekins. Top with plastic wrap and refrigerate for several hours until set. Serve as desired.

Thursday, March 13, 2008
Panna Cotta with Balsamic Strawberries
Although the calendar says it's almost spring, the weather outside still says winter. It's quite cold, and we still get snow several times a week. But we also get little periods of sunshine in the afternoons that cause everyone to come out of their homes and offices to enjoy that bit of warmth--a reminder of better days to come.
Years ago I went to the Strawberry Festival in Plant City, Florida. What a treat! And the flavor of those perfect strawberries has never been far from my memory. So when I saw a basket of strawberries from Plant City at my local grocery store, I knew this was just the taste of spring I've been looking for.
I remembered watching Ina Garten top strawberries with balsamic vinegar as a topping for panna cotta. I've been reading about panna cotta for years and had never tried it, so I figured it was time.
I made Ina's panna cotta recipe, but went my own way for the strawberries; these were served topped with lemon zest, a generous spoonful of balsamic strawberries, and finished with a couple of crumbled sugar-free lemon cookies.
Hello, Spring!
It was just what I was looking for: sweet, light, creamy, a little crunch from the cookies... a beautiful balance of vanilla, strawberry and lemon.
Panna Cotta with Balsamic Strawberries
Panna Cotta
recipe from Ina Garten
1/2 packet (1 teaspoon) unflavored gelatin powder
1-1/2 tablespoons cold water
1 1/2 cups heavy cream, divided
1 cup plain whole-milk yogurt
1 teaspoon pure vanilla extract (I used homemade vanilla extract)
1/2 vanilla bean, split and seeds scraped (I used a mexican vanilla bean)
1/3 cup sugar (I used sugar substitute)
lemon zest for serving
In a small bowl, sprinkle the gelatin on 1 1/2 tablespoons of cold water. Stir and set aside for 10 minutes to allow the gelatin to dissolve.
Meanwhile, in a medium bowl, whisk together 3/4 cup of the cream, the yogurt, vanilla extract, and vanilla bean seeds.
Heat the remaining 3/4 cup of cream and the 1/3 cup of sugar in a small saucepan and bring to a simmer over medium heat. Off the heat, add the softened gelatin to the hot cream and stir to dissolve.
Pour the hot cream-gelatin mixture into the cold cream-yogurt mixture and stir to combine. (I did this whisking constantly.)
Pour into 4 (6 to 8-ounce) ramekins or custard cups (I poured into wine glasses, about half full) and refrigerate uncovered until cold. When the panna cottas are thoroughly chilled, cover with plastic wrap and refrigerate overnight. (I covered the panna cottas in wine glasses right after pouring.)
Balsamic Strawberries
2 pints (4 cups) fresh strawberries, washed, hulled and cut into quarters
1/4 cup white balsamic vinegar, simmered until reduced by half (this sweetens the vinegar significantly and takes away the acidic bite of the vinegar)
1/8 cup sugar (I used sugar substitute, WheyLow brand)
Combine the strawberries, balsamic vinegar and sugar. Refrigerate for 2-3 hours or until read to use.
This is my entry for Food for Plastic Challenge II: A Taste of Spring, hosted by What's Cooking?

Thursday, January 31, 2008
Chocolate Ricotta Mousse


Thursday, December 27, 2007
Leche Flan


